

之前看过一篇文章,介绍的是如何在GIMP中对照片进行处理,产生一种铅笔画的效果。原文在这里,步骤主要分四步:
-
将照片去色;
-
复制图层,将图层反色;
-
对上层图层进行高斯模糊;
-
将上层图层设置为减淡属性;
之前写了一篇跟高斯模糊有关的文章,里面的代码可以直接用,于是简单改了改,就可以实现上面的铅笔画效果了。代码如下:
blur <- function(x, grid, kernelf, ...)
{
    if(grid < 3) stop("grid should be great than or equal to 3!");
    if(grid %% 2 == 0) stop("grid should be odd number!");
    v <- sapply(1:grid - (grid + 1) / 2, kernelf, ...);
    v <- v / sum(v);
    r <- (grid - 1) / 2;
    newx <- tmp <- x;
    for(i in (r + 1):(nrow(x) - r))
    {
        tmp[i, ] <- colSums(x[(i - r):(i + r), ] * v);
    }
    for(j in (r + 1):(ncol(x) - r))
    {
        newx[, j] <- colSums(t(tmp[, (j - r):(j + r)]) * v);
    }
    return(newx);
}
kernel.gauss <- function(x, sigma) dnorm(x, 0, sigma);
blur.gauss <- function(x, grid, sigma) blur(x, grid, kernel.gauss,
                                            sigma = sigma);

library(rimage);
image <- read.jpeg("demo.jpg");
image <- rgb2grey(image);
m <- blur.gauss(1 - image, 5, 3);
pencil <- pmin(image + m, 1)^2;

# For R before 2.11.0
plot(imagematrix(pencil));

# For R 2.11.0 and after, may be faster
x <- dim(pencil)[2];
y <- dim(pencil)[1];
par(mar = c(0, 0, 0, 0));
plot(1, xlim = c(0, x), ylim = c(0, y), type = "n", asp = 1,
     axes = FALSE, xlab = "", ylab = "");
rasterImage(pencil, 0, 0, x, 500);

# Use biOps package to write JPEG
library(biOps);
writeJpeg("output.jpg", imagedata(pencil) * 255);
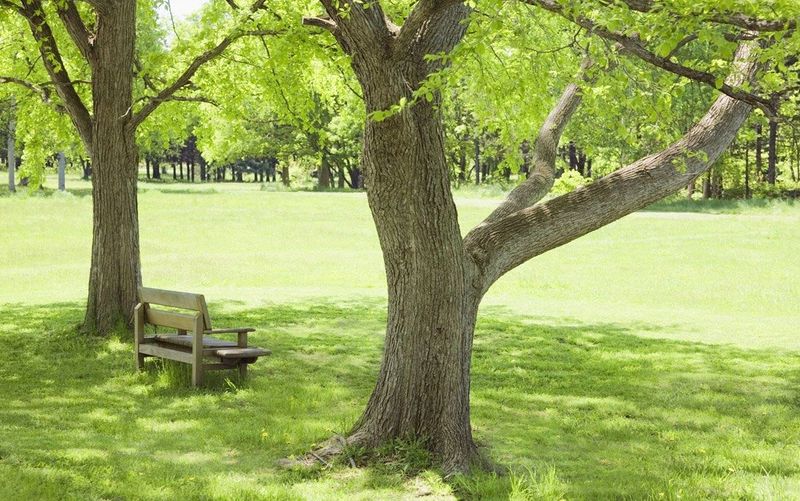
示例图片如下(点击看大图):
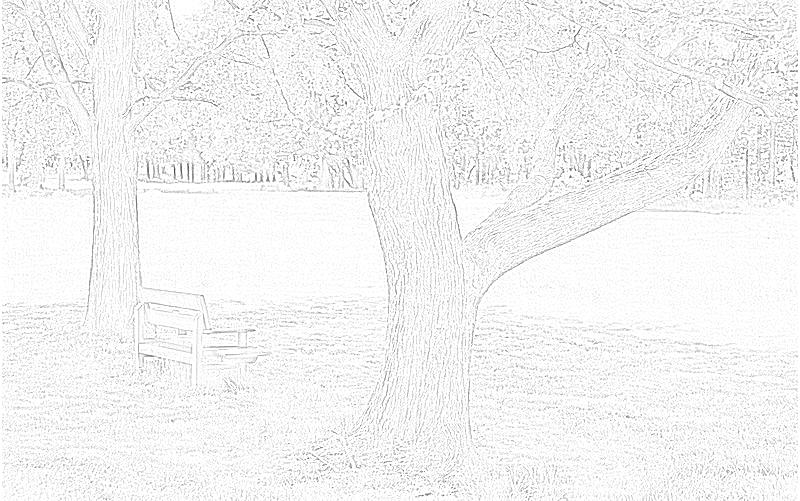
效果图如下(点击看大图):
biOps包到这里下载(包含了依赖文件)。